How Can We Help?
How does the social feed work?
About Fond’s Social Feed
Fond’s Social Feed is a convenient and fun way for your employees to recognize and reward coworkers, all within the Fond platform. With Fond’s social feed, your workforce can view, ‘like,’ and comment on all recognition events in a single aggregated location. Whether you’re celebrating a team win, work anniversary, or praising a fellow colleague for exhibiting a company value, Fond’s social feed is your one-stop-shop for real-time visibility into every moment of employee recognition.
Navigating to the Social Feed
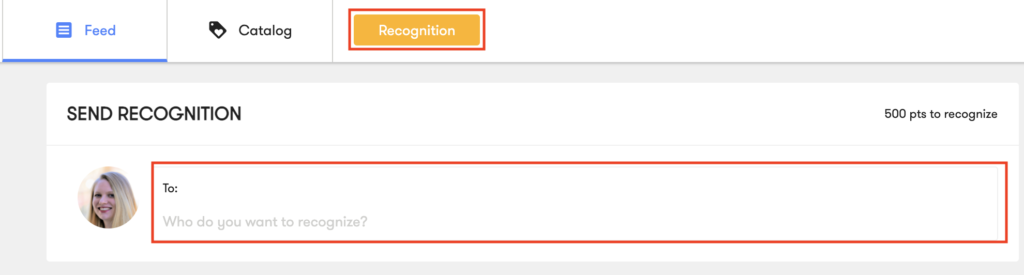
Log into your Fond account. You will automatically navigate to the social feed. To view the social feed from another page in Fond, click the Feed tab at the top of any page.

Send Recognition from the Social Feed
To send recognition from the social feed, click the To: field in recognition form at the top of the page.
The recognition form will appear.
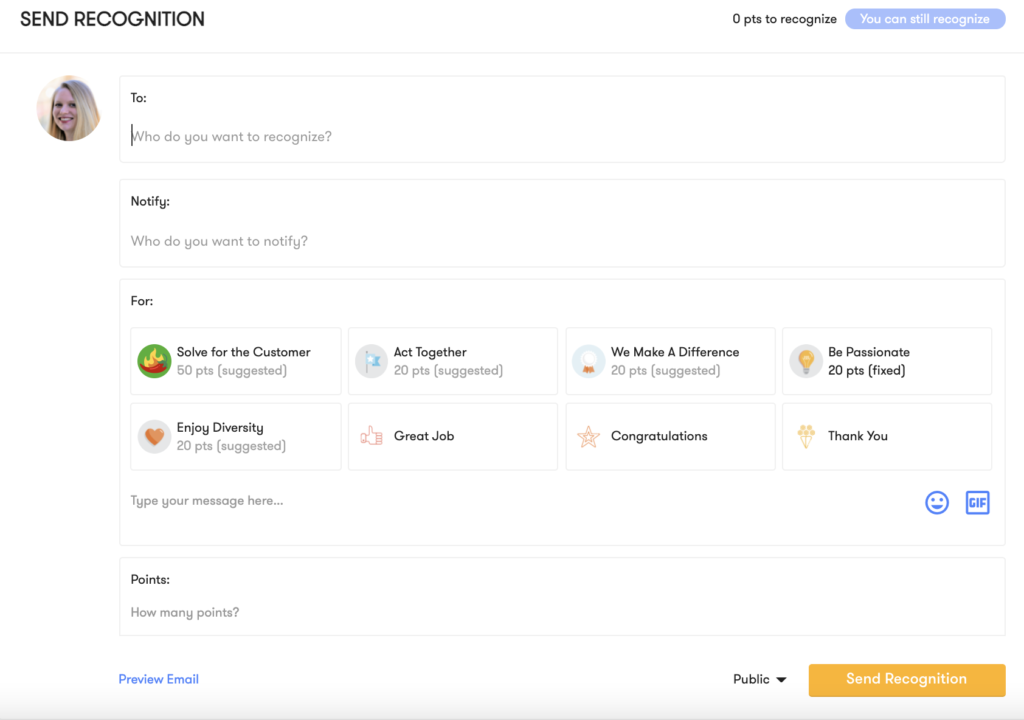
In the To: field, type the email address of who you want to recognize. Your recognition recipient will appear below. Click to select their profile.
In the Notify: field, you can choose who you would like to notify about your recognition. If you have any email aliases representing your entire company or a group within your company (all@, engineering@, etc.), you have the option to CC those as well.
In the For: field, select your recognition occasion and type a message to who you are recognizing.
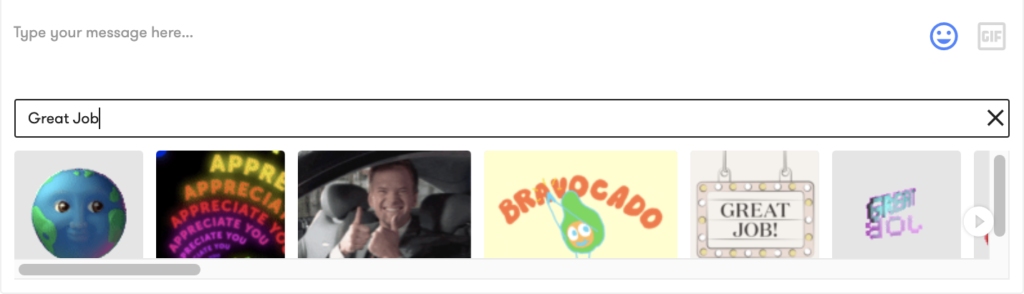
You can also add a GIF, image, and/or emoji to your message by clicking the icons to the right. To select a GIF, click the GIF icon and type a keyword into the search bar, as show below.
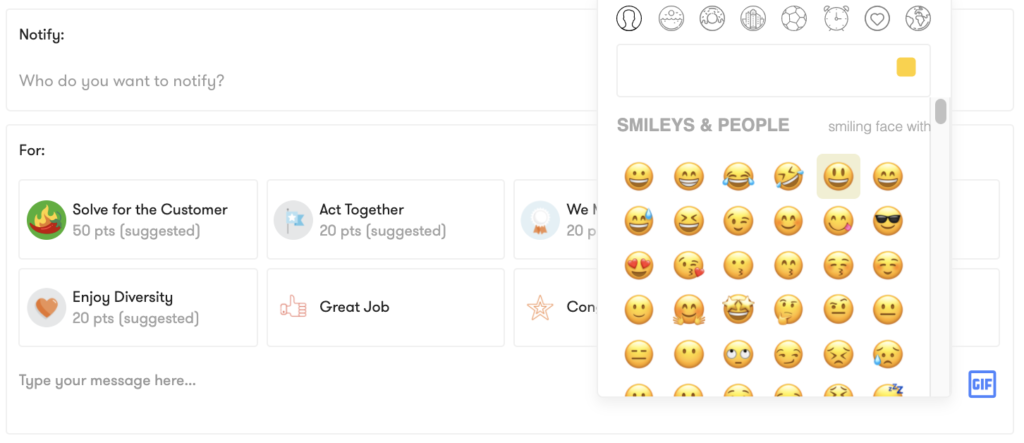
To select an emoji, click the 😄 icon and click on your desired emoji from the emoji selector. You can also view emojis by different categories by clicking the icons at the top of the emoji selector.
In the Points: field, type how many points you want to send to the recipient.
You can click Preview Email to preview the email that will be sent to your recipient and who you have notified.
Click Public at the bottom of the window to change the privacy settings of your recognition.
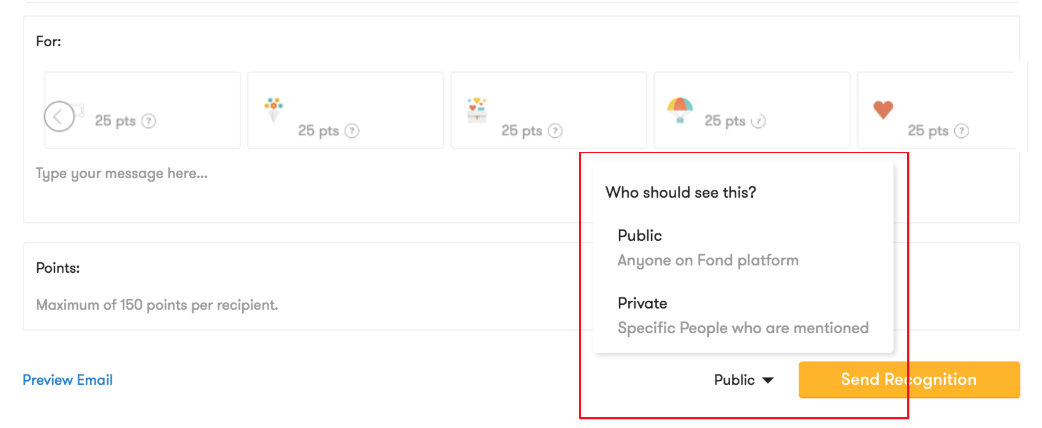
Click Send Recognition to send.
Like and Comment
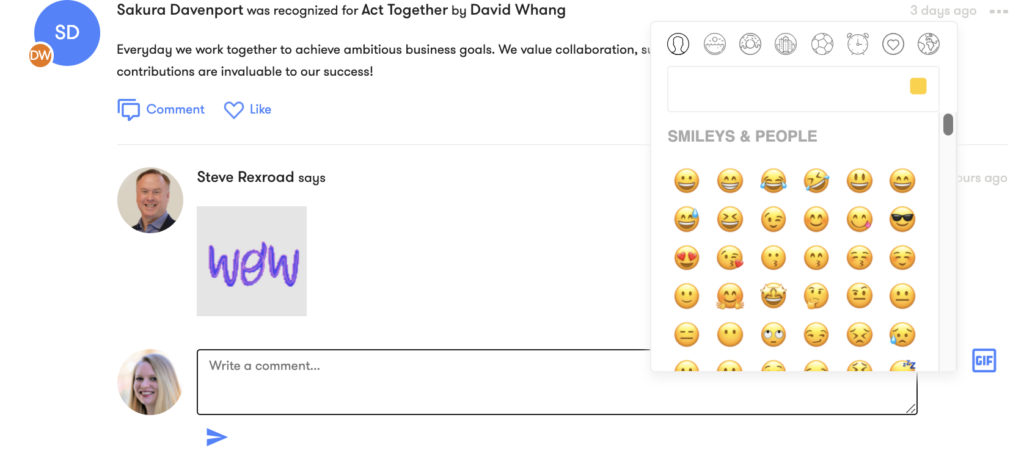
You can like and comment on any recognition event, all within the feed.
To like a recognition event, simply click the Like icon below the recognition in the feed.

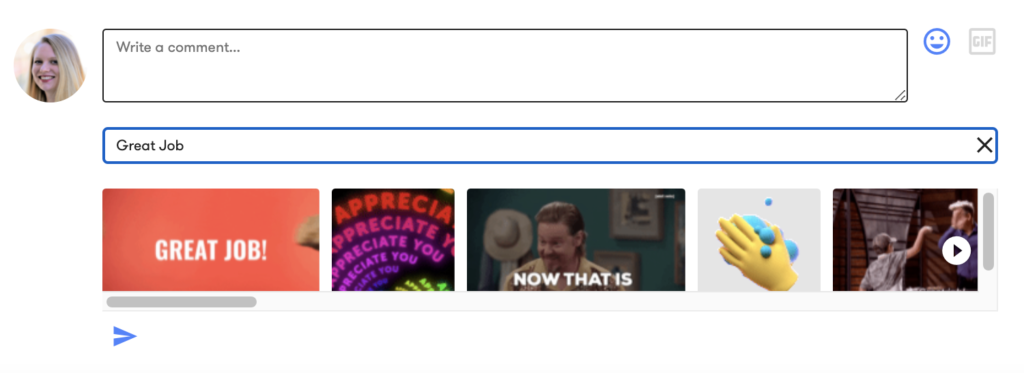
To comment on a recognition, select the Comment icon in the recognition. A comment box will generate below.

To add a GIF to your recognition, click the GIF icon on the right. Search for a GIF by typing related keywords in the search bar.
To add an emoji (or three!) to your recognition, click the 😄 icon and click on an emoji from the emoji selector.
Send your comment by clicking the arrow icon on the bottom left.
Notifications
You’ll receive notifications via email if:
- You have been recognized
- You have been cc’d on a recognition event
You’ll receive notifications from the bell icon on the top right corner of your screen if:
- You have been recognized
- You have been cc’d on a recognition event
- Someone has liked or commented on a recognition you received
- Someone has liked or commented on a recognition you sent
- Someone has liked or commented on a recognition event you are cc’d on
To view a full list of your notifications, click the See More option at the bottom.
Feed Filtering
You can filter the feed to view recognitions by department, office country, office state, office city, or supervisor. When adding these filters, you will see recognitions sent and received by employees/users that meet your criteria.
For example, if your company has an office in Tokyo, you can filter the feed by office city to see all of your recognitions in Tokyo. You will see all recognitions sent from the Tokyo office to others and all recognitions sent to employees in the Tokyo office.
To filter the feed, first configure your filter settings.
Navigate to Admin > Settings > Feed Settings.

Here, you’ll choose which filters to add to your feed so you can easily view recognitions sent and received throughout specific segments of your workforce. These filters are determined by how you configure your roster, so ensure your roster is up-to-date! Select which filters you want to see in the feed by clicking the checkboxes.
Once selected in Feed Settings, filters will appear in the top left of the feed below the recognition form. To select a filter, click Select a Filter and choose your filter from the dropdown menu. Once you have your filter selected, another dropdown will appear where you can search for your desired criteria (e.g. Tokyo) and filter your feed.

Note: you can only use one filter at a time to filter the feed.
About the Group Filter
You can rename the Group filter to match the data you store in the “Groups” column of your employee roster. For example, if you use the “Groups” column to store location data about your various teams (e.g., west coast and east coast departments), you can rename the Group filter to “Location” to see all recognition for west coast and east coast employees.

Note: Renaming the Group filter will only change how this filter displays in the feed. Renaming will not affect how your HRIS integration or roster sync is configured. Custom group names are not available in report exports.