How Can We Help?
How do I create and edit a custom recognition occasion?
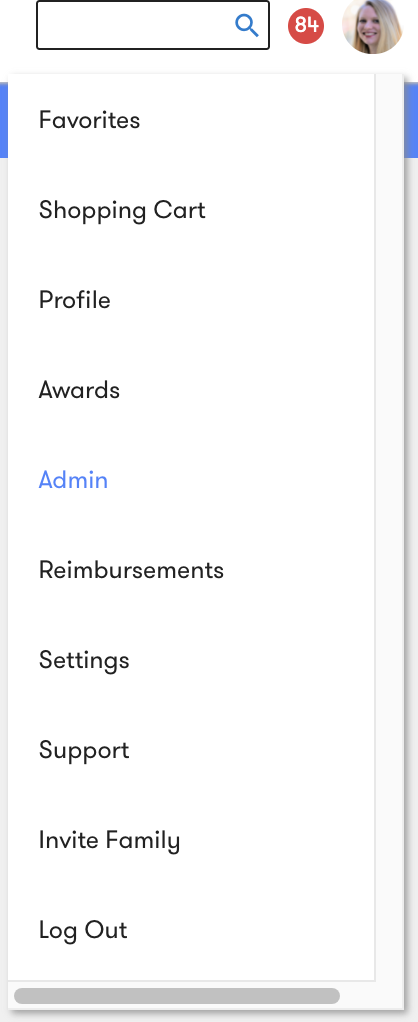
To create a custom recognition occasion, first login to Fond. Navigate to Admin using the dropdown menu at the top of the page.
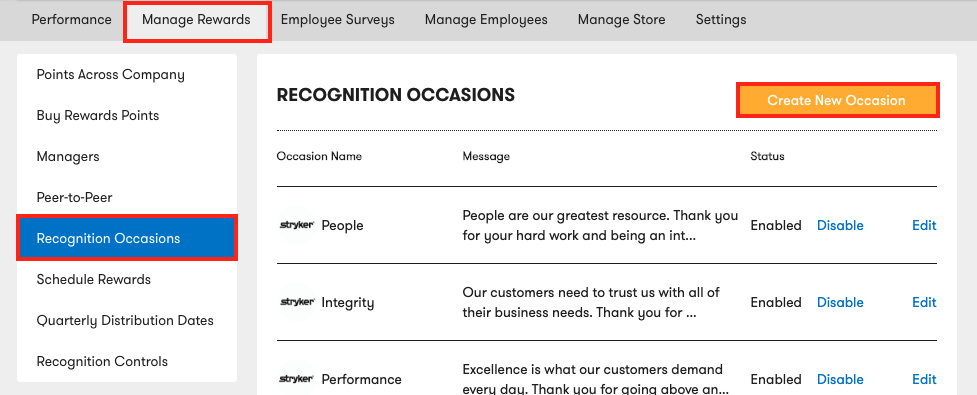
Select Manage Rewards. Select Recognition Occasions in the sidebar on the left. Click the Create New Occasion button.
A form will appear on the right.
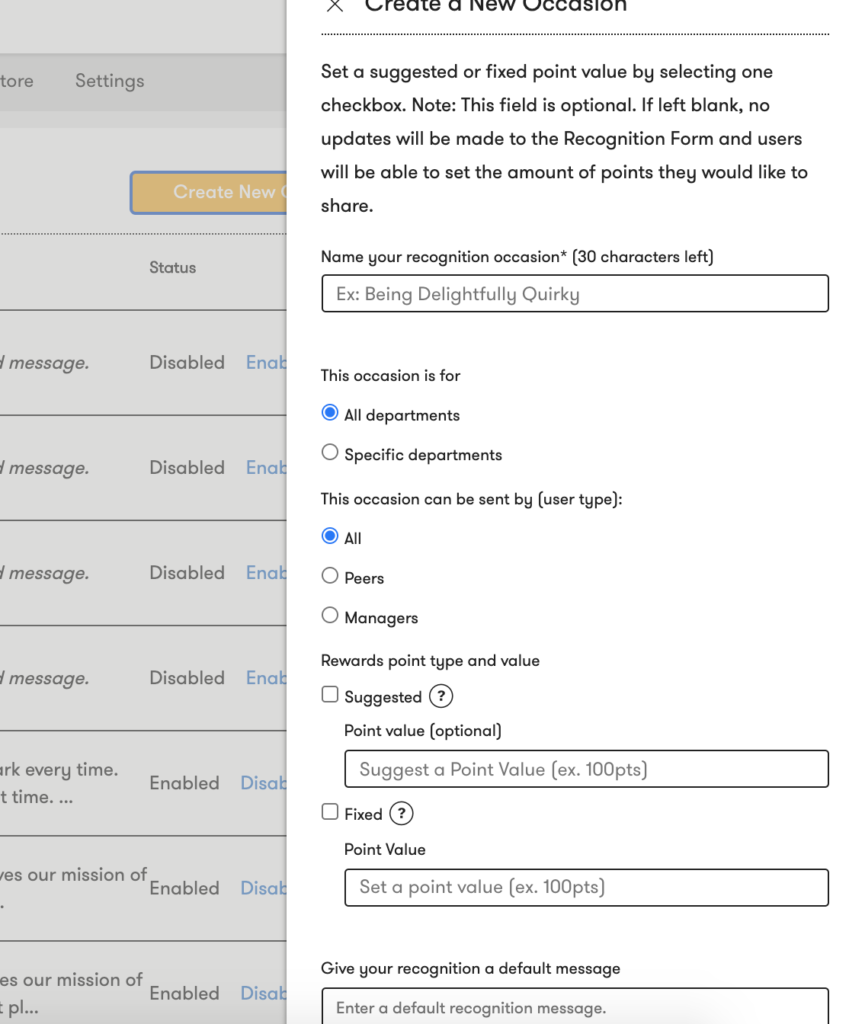
Fill out the name of your custom recognition occasion.

You can create recognition occasions for individual departments and specify which users can send recognitions.
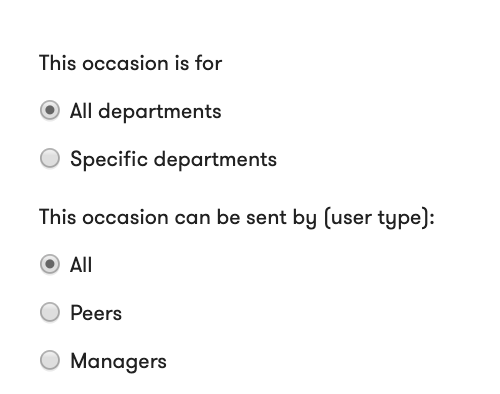
To specify what department this recognition occasion applies to, select Specific department. Select the department from the dropdown or type the name of the department into the text box.
Note: This data is supplied by your company roster, so ensure your roster is updated to perform this task.

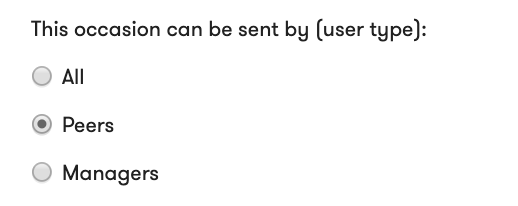
To specify which users can send this recognition, select Peers or Managers.
Add the reward points value for this occasion. You have two options for adding rewards points values: suggested and fixed. Check the option you want to apply to this recognition occasion.
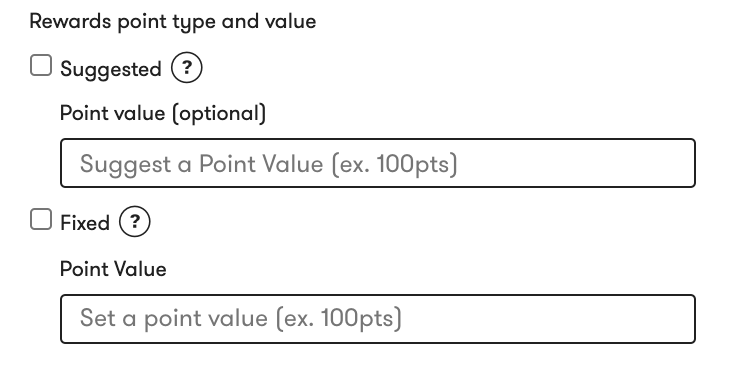
Suggested means that when users select this occasion, they will see this suggested amount of points to send with their recognition. Users can change the amount of points sent with a recognition if they so choose.
Fixed means that the point value for this recognition will be set at a specific value and cannot be changed by the user. Users sending this recognition can only send it for the specified amount.
Select your preference and input the amount of points desired.
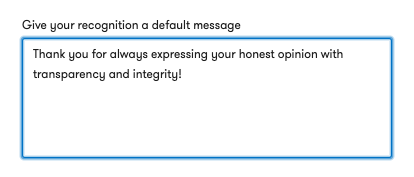
Enter a default message that can be sent along with your recognition. This message can also be customized by users if they so choose.
Choose an image for your recognition occasion.
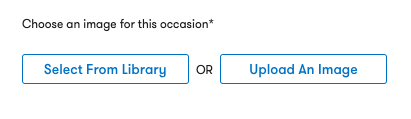
You can either upload your own image or select from Fond’s library of pre-created images, seen here.

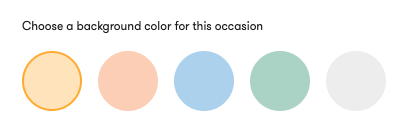
Choose a background color for your recognition occasion.
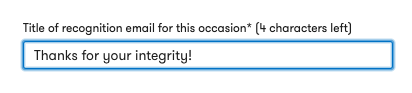
Add the title of the email that will be sent to users when they are recognized for this occasion.
You can preview the email sent to recipients by clicking Email Preview. Once you are ready to create your custom recognition occasion, click Create Occasion.

You will see a banner at the top of the page verifying that you have created a custom recognition occasion. The new recognition occasion will appear at the top of the Recognition Occasions page.
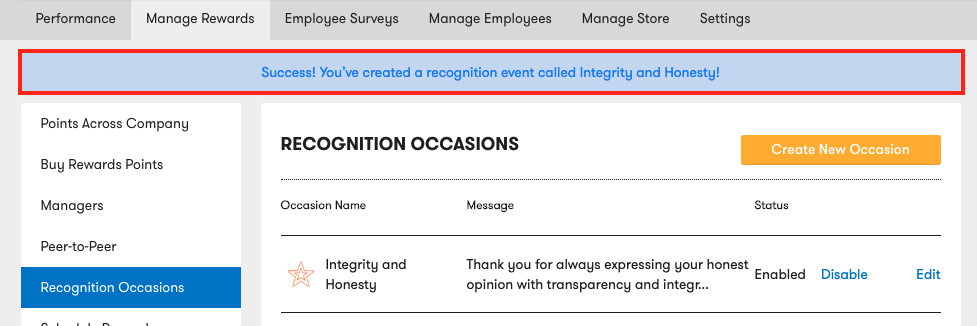
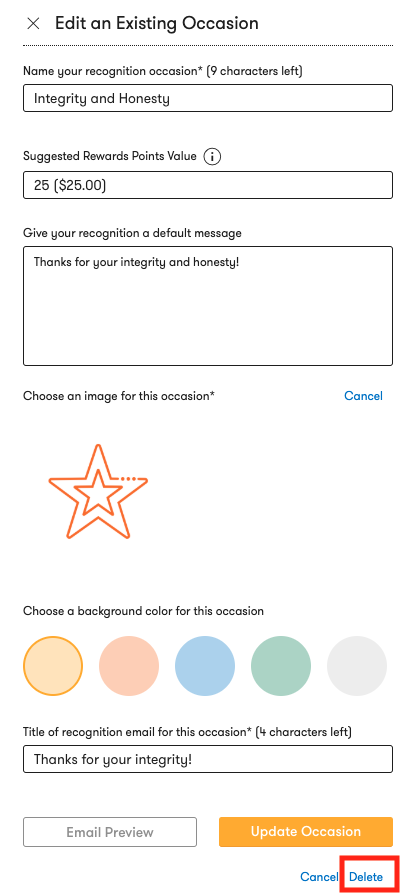
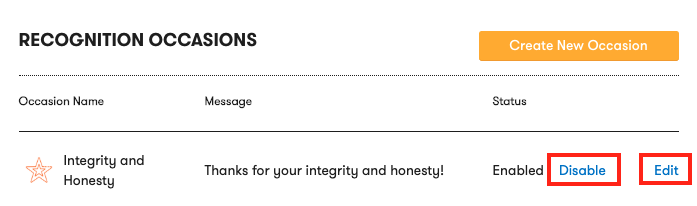
You can edit your custom recognition occasion at any time by selecting Edit on the right. You can disable your recognition by selecting Disable.
To delete your recognition, click Edit, scroll to the bottom of the form, and click Delete.